Objective: to place a bounding box around each object in an image and export
each image crop to its own JPG file.
This example will cover
- Inselect's image and file handling,
- how to create and edit bounding boxes,
- how to automatically segment images and
- how to subsegment boxes round overlapping objects.
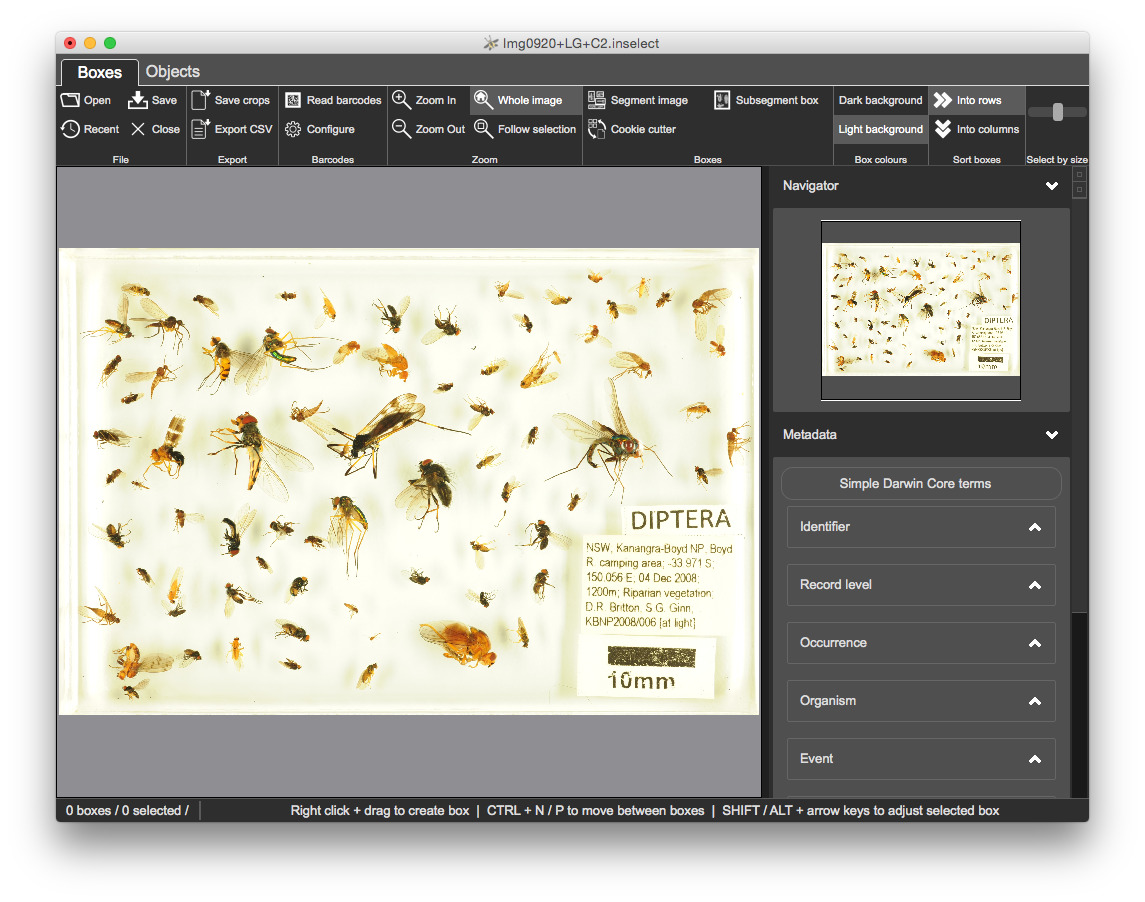
Opening the file
2.InsectSoup/Img0920+LG+C2.jpg - an insect soup image of Diptera - true flies
- from Australia, courtesy of the Australian Museum.
Use the open file using one of
- File menu, Open,
CTRL + O,- open button on toolbar or
- drag-and-drop (at the time of writing, this doesn't work on Mac - we will fix this in a future release).
Created files
Inselect has created two files
1. Img0920+LG+C2.inselect
This is a small file that will contain information about bounding boxes and their associated metadata.
-
Img0920+LG+C2_thumbnail.jpg- Creating the thumbnail
JPGis a once-only operation - The thumbnail
JPGis very quick to read - far quicker than the large high-resolutionTIFFfiles that are typically used in digitisation programmes - Inselect therefore loads and shows the thumbnail whenever the document is opened
- Inselect loads the original full resolution image only as required - when saving crops or reading barcodes
- Creating the thumbnail
Image handling
On the 'Boxes' view you can zoom in and out by
- Holding down
CTRLand spinning the mouse wheel up or down - On a Mac, holding down
⌘and swiping up or down with two fingers on trackpad - Holding down
CTRLand pressing the+or-keys - Clicking the toolbar buttons
You can pan around the image by
- Using the scrollbars
- Spinning the mouse wheel up or down and, if the mouse allows it, clicking the mouse wheel left and right
- On a Mac, by swiping with two fingers on trackpad
Creating and edited bounding boxes
You can create boxes with
- Mouse right-click and drag
- On a Mac, click the trackpad using two fingers
You can select boxes with
- Mouse left-click and drag
- Left clicking on a box
CTRL + mouse clickto add / remove a box from the selected boxes- Select all with
CTRL + A - Select none with
CTRL + D
You can move selected boxes using
- Mouse drag and drop
- The arrow keys
Segmenting
Creating boxes by hand is tedious - we want to minimise manual steps and get the computer to do the hard work for us. Run Inselect's segmentation algorithm
- Click on the 'Segment image' button on the tool bar or
- Press
F5
Inselect will attempt to detect individual objects within the image and place a bounding box around each. It uses a general purpose algorithm that works well with many of the different specimen types that we tried.
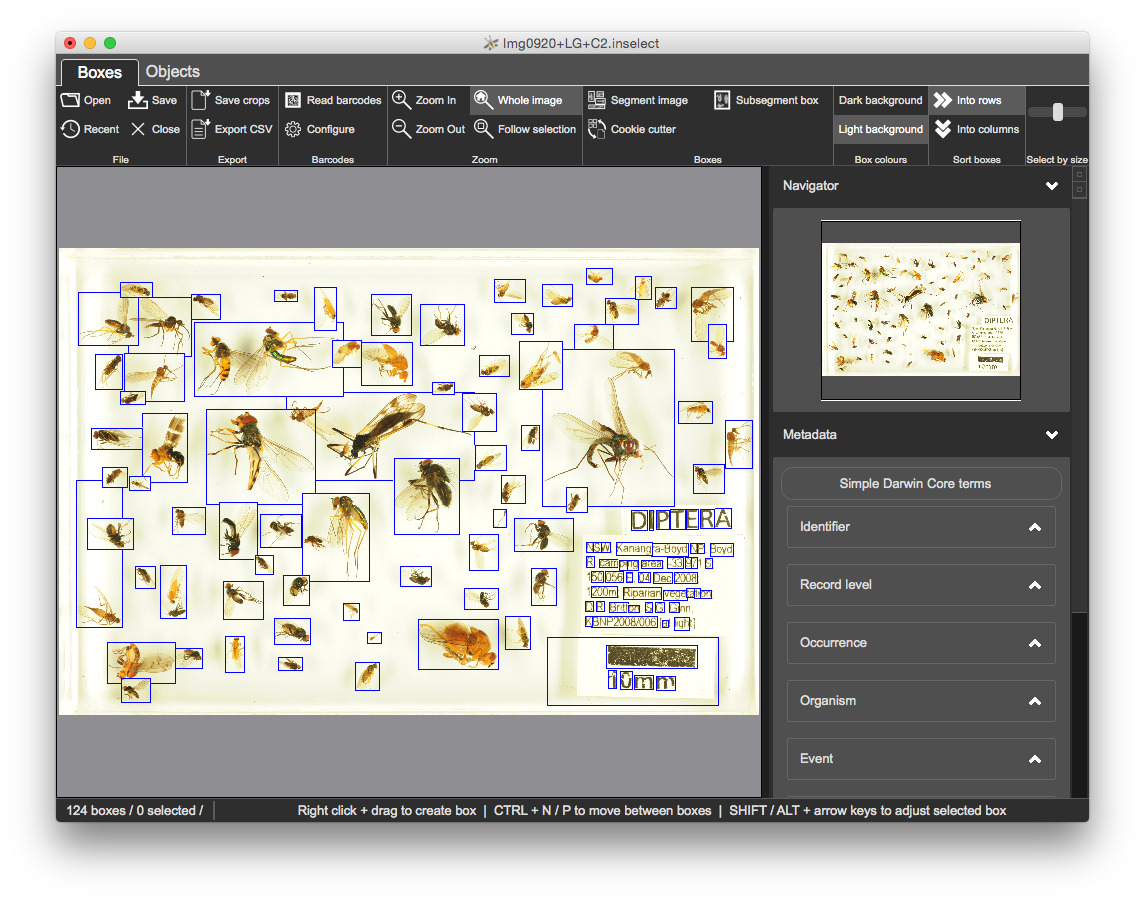
The segmentation does a reasonable job but is not perfect - some manual refinement is required.
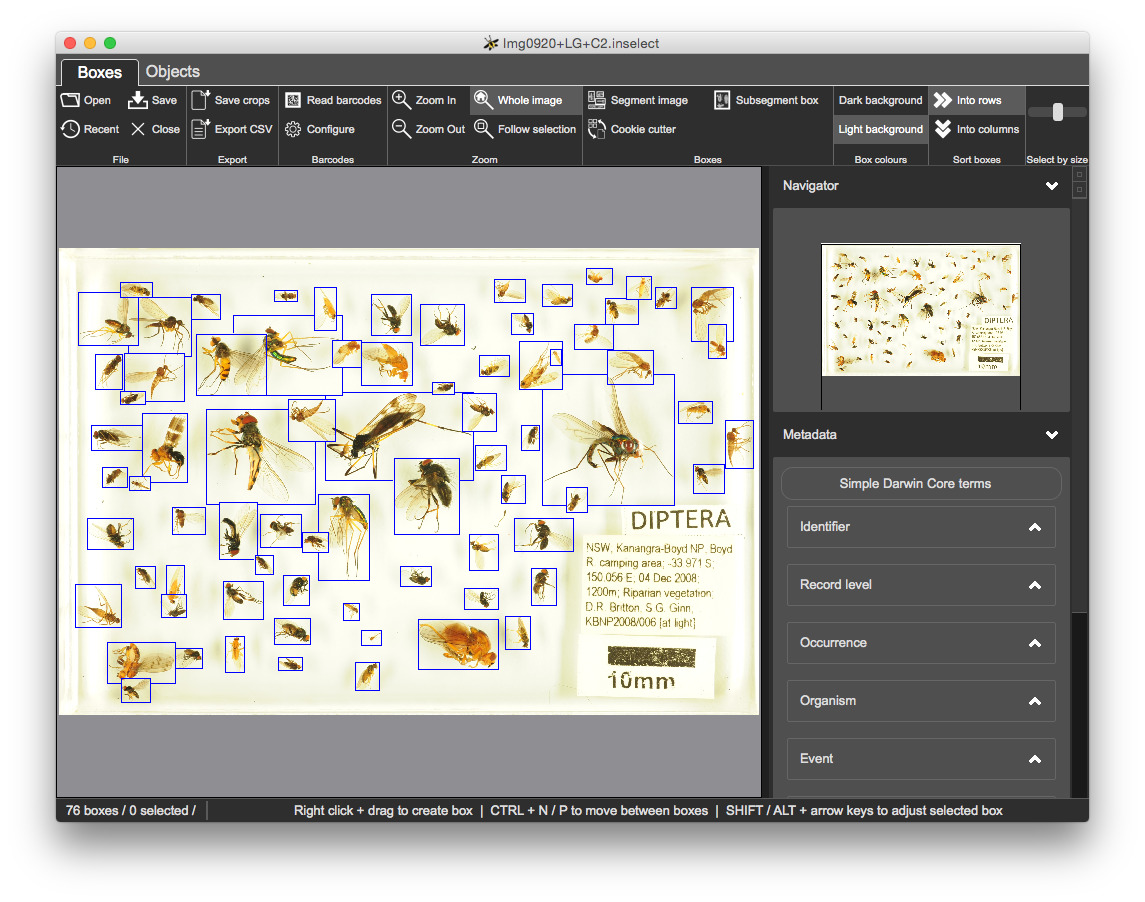
Refining the results of segmentation
We will check and refine each of the bounding boxes created by the segmentation algorithm. We will also create any bounding boxes that are missing.
- Click on a box
- Press
Zto zoom to the current selection -
To navigate to next / previous box
CTRL + Nto go to next boxCTRL + Pto go to the previous box
Delete unrequired boxes
Delete- on a Mac
CTRL + ⌫
Adjust borders of bounding boxes where they are too big or too small
You can adjust boxes using
- The mouse resize handles
-
Keyboard arrow keys
SHIFT +arrow keys moves the bottom right of the boxALT +arrow keys moves the top left of the box
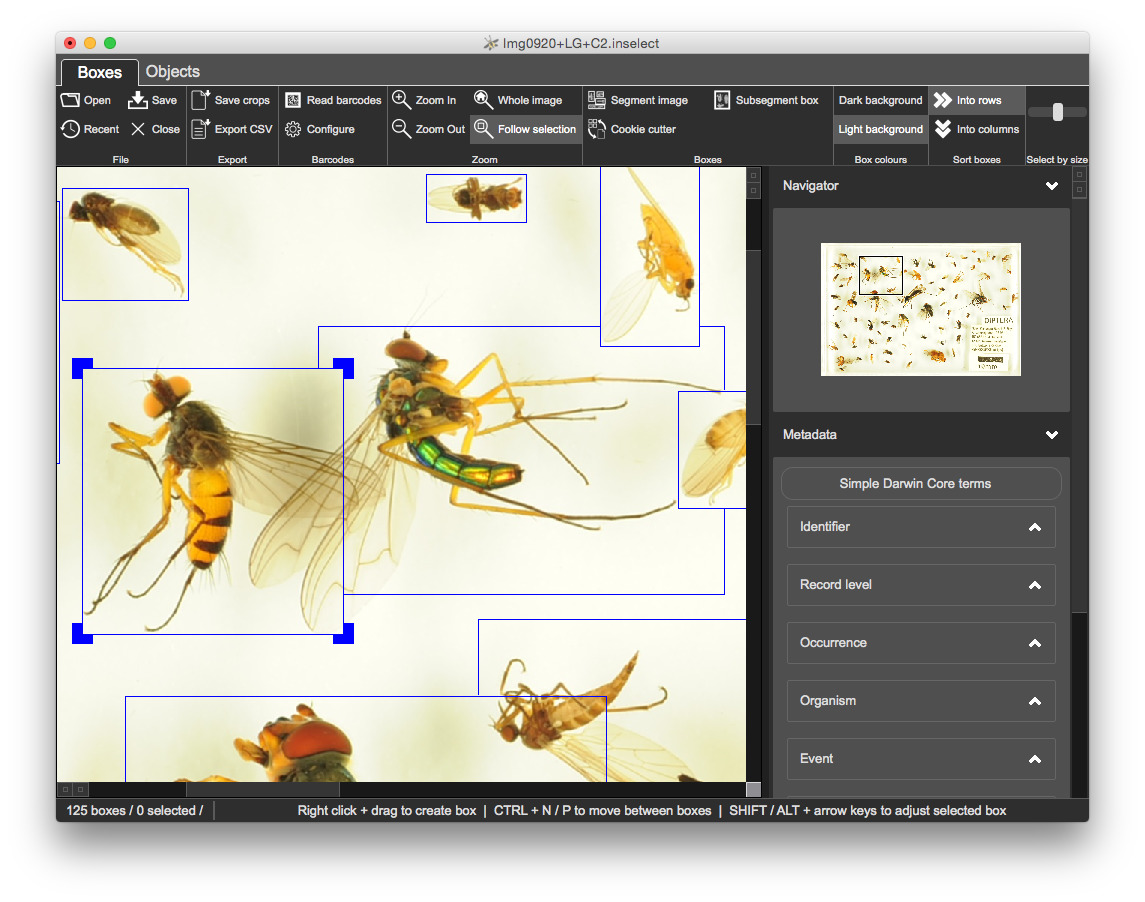
Split apart boxes that encompass more than one object
This often happens when objects slightly overlap e.g., insect wings. We could resize the large box and create new ones but this is uneccesary manual work.
SHIFT +click on the approximate centre of object within the bounding box - Inselect marks each point with a crosshair- You can remove crosshair by unselecting the box

Run the 'Subsegment box', either from the toolbar or with F6
Export crops
Once you are happy with the bounding boxes, click on 'Save crops' in the 'Export' section of the toolbar.
- Inselect loads the original full-resolution image
- It applies bounding boxes to the original full-resolution image and crops each box
- Saves each box to
JPG- we could ask Inselect to export to another image format - this will be covered later - No EXIF data are copied